Hi friends! It’s Dori, and I’m back to fulfill my promise of a post about frosting.
Yay frosting! I mean, I feel like this is really important because a cupcake without frosting is hardly a cupcake at all.
There are about a million different types of frostings out there, from cooked frostings (think 7 minute frosting) to meringues (lots of egg whites), but today I just want to talk about one type: American buttercreams.
The French, the Italians, and the Swiss all have their own versions of buttercreams, but they’re a bit fussier. The American version is so simple, in fact, that it isn’t even a “real” buttercream according to most snobby jerkfaces. Real buttercream or not, the American version is simple, easy to make, and, when done right, everything you want a frosting to be: smooth, surprisingly light, and perfectly sweet.
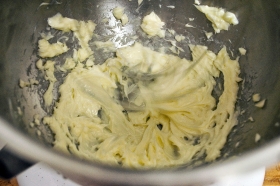
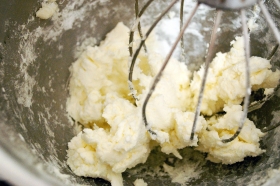
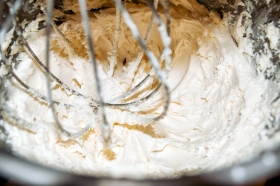
So here is the basic process: whip butter, add sugar, whip some more, repeat until it looks/tastes like slightly thick frosting in need of flavor.
“But Dori,” hypothetical you worries, “I don’t like super sweet frostings! Is this buttercream going to be too sweet for me?” No. I know exactly the type of frosting you’re concerned about. It’s usually on grocery store cakes and it’s somehow vaguely crunchy? Yeah, this isn’t that. I don’t really know what that is, but I would not do that to you. I know how hard you worked on those cupcakes! You’ll have to stop yourself from eating this frosting right out of the bowl.
But before we get started on the ingredients, I want to mention that this recipe requires a bit of hardware: you need a mixer. A hand mixer will totally work (and you can get one for less than 20 bucks on Amazon), but you really can’t make this by hand. Your arm will fall off if you try. My arm hurts just thinking about it. There will be a lot of whipping.
American buttercream is really about two ingredients: butter and powdered sugar. The butter must be slightly soft and not melted, and the powdered sugar must be powdered.
To make the frosting, you have to whip the sugar into butter while whipping in some air in the process. Butter that’s too soft will absorb the sugar but reject the air, butter that’s too hard will not whip at all. It honestly doesn’t matter if the butter is salted or not. I always buy salted because it lasts longer (Adam? explain that?), and I’ve never noticed a salty taste in any baked goods.
[Salted butter lasts longer because salt is a preservative. We used it to prolong the freshness of salmon when we made gravlax. Salted butter lasts about three months in the fridge, while unsalted lasts about a month. If asked to defend the use of unsalted butter in recipes, most cooks will say the shorter shelf life of unsalted butter means you’re likely to be getting fresher butter, but just buy fresh salted butter and it’ll be fresh for the recipe and live longer if you have some left over. — Adam]
If you try to use regular sugar, your frosting will be gritty and vaguely crunchy. No bueno. Oh! I wonder if that’s how that make that awful grocery store frosting!
So here is the basic process: whip butter, add sugar, whip some more, repeat until it looks/tastes like slightly thick frosting in need of flavor. Add flavoring and a tiny bit of milk. Easy, right?
(Note: If you’re making a frosting with cream cheese or peanut butter, whip it with the butter. If you’re making a frosting with cocoa powder, add it with the sugar.)
So yeah, I’m not going to tell you how much sugar to put in. Not even a ball park amount. Why not? I hate measuring powdered sugar. It gets everywhere. So I don’t. I cut a small hole in the bag squish it into the mixing bowl right from the bag. If it still tastes or looks like butter, add more. If it’s too thick or if it looks like pebbles, add milk (1 t at a time) and whip more.
That’s really all there is to it.
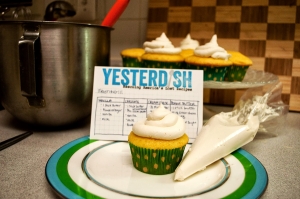
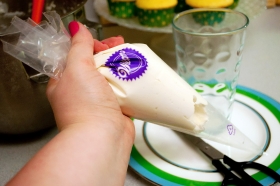
Once you’ve made your frosting, I suggest piping it onto the cupcakes. I used a pastry bag, but you can use a freezer bag (not a sandwich bag, the plastic is too thin and it will stretch and not squeeze). To fill it, place the bag inside a cup with the edges folded over (see pic) and use a spatula to spoon the frosting into the cup.
Cut off the corner of the filled bag so you have an opening about the width of your thumb. Squeeze the frosting towards the opening while twisting the top of the bag to prevent the frosting from coming out the wrong side.
Hold the bag at the twist (the top of the bag) with your dominant hand and use your other hand to keep the bag steady.
Pipe the frosting onto cupcakes by starting at the outer edge and swirl towards the center. When you get to the center, press the bag down just slightly and then pull straight up to get a point.
Mess up? You can scrap the frosting back into the bag and try again OR just eat it anyway because CUPCAKES.
From Yesterdish’s recipe box.
Yesterdish’s Buttercream Frosting
Vanilla
- 1 stick butter
- powdered sugar
- vanilla
- milk
Chocolate
- 1 stick butter
- 3/4 c. unsweetened cocoa powder
- vanilla
- milk
- powdered sugar
Cream cheese
- 1/2 stick butter
- 4 oz. cream cheese
- powdered sugar
- vanilla
Peanut butter
- 1 stick butter
- 10 oz. cream cheese
- 2/3 c. peanut butter
- powdered sugar
- salt
Beat room temperature butter until it’s lighter. Stop mixer; add powdered sugar, mix on low at first, then increase speed as sugar absorbs. Continue adding sugar until it becomes slightly thick frosting. Add milk, vanilla. Beat on high. Frost!


